Basement walls don’t have to feel cold, damp, or uninviting. Whether you’re converting a finished space into a living area, home office, or entertainment zone, smart wall decor can completely transform the mood of the room. The right combination of paint, paneling, lighting, and textiles turns a basement from “bonus storage” into a space your family actually wants to spend time in. This guide walks you through eight practical decor strategies that work with basement realities, moisture concerns, limited natural light, and irregular walls, while keeping projects DIY-friendly and budgets realistic.
Table of Contents
ToggleKey Takeaways
- Basement wall decor starts with paint in warm neutrals and proper moisture-resistant primers, which is the fastest and most affordable way to transform the space.
- Shiplap, wainscoting, and wood paneling conceal uneven concrete, add character, and manage moisture through furring strips that create essential air gaps.
- Layered lighting—ambient, task, and accent—is critical in basements to showcase your decor and counteract the lack of natural light.
- Wallpaper, murals, and gallery walls disguise concrete-bunker aesthetics and draw the eye upward, making the room feel larger and less cave-like.
- Textiles like rugs, curtains, and upholstered furniture warm the space acoustically and physically while moisture-resistant materials prevent mildew in humid basement conditions.
- Address moisture concerns and use proper concrete fasteners upfront; prep work and durability matter more in basements than any other room.
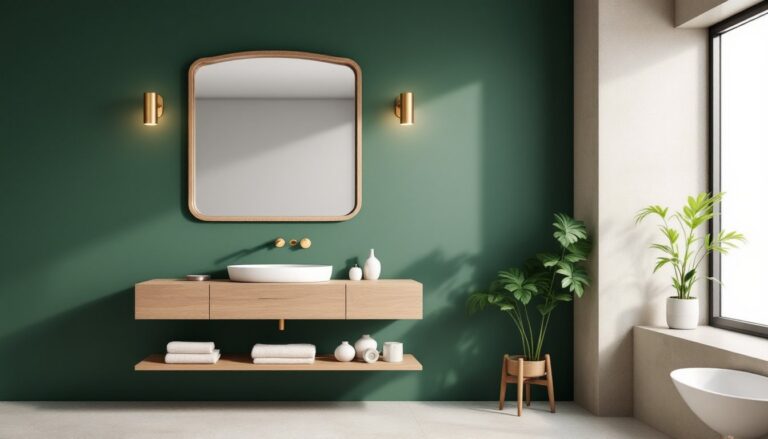
Paint Colors That Make Basement Walls Feel Inviting
Paint is the fastest, cheapest way to brighten a basement and set the room’s tone. The trick is choosing colors that counteract the typical basement funk, dimness, mustiness, and isolation from natural light.
Lighter, warmer neutrals like cream, soft gray, or warm white reflect available light and make the space feel larger. Avoid pure white: it reads clinical in low-light spaces. Instead, gravitate toward whites with warm undertones (check paint chips under your actual basement lighting before committing). If you want personality, warm grays with beige undertones or soft sage green add character without darkening the room.
Before painting, prep matters enormously. Basement walls often have moisture issues, efflorescence (salt deposits), or old stains. Clean the wall thoroughly with a stiff-bristled brush and TSP (trisodium phosphate), then rinse and let dry fully, at least 48 hours. If you’ve had any water intrusion, address the source first: paint doesn’t fix leaks, it just hides them until mold appears.
Use a concrete-bonding primer or masonry primer rated for basement conditions, not standard drywall primer. It adheres to concrete and helps resist moisture wicking. Top it with a semi-gloss or satin finish paint (glossier finishes are more washable and moisture-resistant than flat or matte). Two coats are standard: basement walls can be thirsty.
If you want to add visual interest without darkening the whole room, accent walls work well. Paint one wall a deeper tone, navy, charcoal, or warm taupe, to create focal points without making the space cave-like. Pair accent walls with artwork or shelving to make them intentional, not accidental.
Shiplap and Paneling: Budget-Friendly Wall Coverings
Shiplap and wood paneling conceal uneven concrete or cinder block and add instant character. They’re also practical for basements because they create a small air gap that helps manage moisture, and they’re easier to replace if damage occurs.
Shiplap (tongue-and-groove boards with a rabbeted joint) costs $1–$4 per linear foot depending on material. Authentic pine or reclaimed wood runs higher: engineered alternatives are budget-friendly. Install shiplap horizontally on a furring strip system, thin wooden strips fastened to the wall with concrete anchors, to create that air gap. This prevents moisture from pooling behind the boards.
Wainscoting (paneling on the lower portion of the wall, typically 3–4 feet high) is a smart basement move. It protects walls from bumps, hides foundation irregularities, and stops halfway, so you can paint the upper wall a different color for visual interest. Real wood requires more finesse: pre-made MDF wainscoting kits are cheaper and faster for DIYers.
For those who want the look without the commitment, peel-and-stick wall planks offer a middle ground. They won’t handle moisture as well as traditional shiplap, so use them in drier basement zones (not near water heaters or sump pumps).
Fastening to concrete requires concrete anchors, powder-actuated fasteners, or adhesive specifically rated for concrete. Standard drywall fasteners won’t hold. If moisture is present, drill drainage holes behind the furring strips every few feet to allow air circulation. This prevents moisture pockets that lead to mold.
Accent Walls With Wallpaper or Murals
Wallpaper adds color and texture without the permanence of paint and can disguise small wall imperfections better than flat walls. In basements, moisture-resistant vinyl or fabric-backed wallpaper is essential: standard paper tears and peels when exposed to humidity.
Choose peel-and-stick vinyl wallpaper for easiest DIY application. It requires no paste, minimal surface prep beyond cleaning, and peels away cleanly if you want to change it later. Patterns that work well in basements include horizontal stripes (elongate walls), small geometric prints, or subtle texture. Avoid large, busy florals in dark basements, they can feel oppressive without good natural light.
For a bolder statement, a mural (either a hand-painted design or a large-format wallpaper mural) creates a focal point and disguises the concrete-bunker feel. A mural depicting a window, forest, or geometric pattern tricks the eye and makes the space feel larger. If you’re not confident hand-painting, pre-printed murals on peel-and-stick material are affordable and reliable.
Before applying wallpaper, clean the wall and fill any holes or deep imperfections with spackling compound. Unlike paint, wallpaper reveals bumps and irregularities. Smooth, clean surfaces are non-negotiable. If the wall is very rough, skim coat with joint compound or primer-primer designed to seal porous surfaces and create a smooth base.
Measure your wall height and width carefully, then add 2 inches to your measurements when ordering peel-and-stick. Apply from top to bottom, smoothing out air bubbles with a soft brush or squeegee as you go. Work slowly, rushing causes wrinkles.
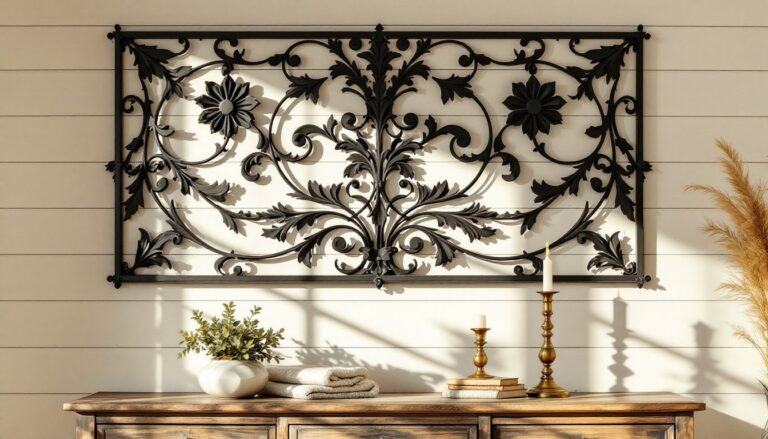
Artwork and Floating Shelves for Visual Interest
Bare walls feel institutional. Artwork, photography, and shelving break up the monotony and give the basement personality. The key is choosing work appropriate to the space and hanging it securely.
Gallery walls (a cluster of framed prints, photos, or mixed media) are popular and work especially well in basements because they draw the eye upward and outward, making rooms feel less cave-like. Start with a focal point, a larger piece or mirror, then build around it with complementary frames. Mix frame styles (wood, metal, painted) for visual rhythm, but keep colors cohesive (all black frames, or a mix of black and natural wood, for example).
When hanging artwork on concrete or cinder block, use concrete anchors rated for the weight you’re hanging. A standard picture hook won’t hold: it’ll pull out. Toggle bolts or sleeve anchors are reliable for drywall over concrete, but if you’re hanging on bare concrete, masonry anchors or adhesive strips designed for heavy items work. Always err on the side of heavier-duty fasteners.
Floating shelves add storage, display space, and architectural interest. They’re ideal for showcasing baskets, plants, books, or decorative objects. Install shelves on studs if the wall is framed, or use heavy-duty floating shelf brackets anchored directly to concrete with appropriate fasteners. A 24-inch shelf can hold 25–50 pounds depending on the bracket: don’t overload it.
Shelf styling tip: group objects in odd numbers (three books, a plant, a small box) and vary heights. A shelf full of single items looks sparse: a shelf with clusters looks intentional. Interior design trends often emphasize balance between open and closed storage, so mix open shelving with closed cabinets if possible to avoid visual chaos.
Lighting Solutions That Highlight Your Decor
Basements lack natural light, so intentional artificial lighting is critical. Without it, even beautiful decor disappears into gloom. Layered lighting, ambient, task, and accent, makes the space functional and highlights your design work.
Ambient lighting (overhead ceiling fixtures) provides general illumination. Recessed lights or flush mounts work, but they can feel harsh and flat. LED panels or troffers (flat, rectangular fixtures) distribute light more evenly and use less energy. Aim for at least 50–75 lumens per square foot in a living area: basements often need more than upstairs rooms because walls absorb light.
Task lighting targets specific zones, a desk, craft table, or reading corner. Desk lamps, track lighting, or under-shelf fixtures work. Task lights also warm up the space emotionally: a pool of warm light feels cozier than flat overhead brightness.
Accent lighting highlights your decor: picture lights above artwork, strip lights behind floating shelves, or uplighting behind plants. Accent lights are subtle but transform a room’s mood. Warm-white LEDs (2700K color temperature) feel cozy: cooler whites (4000K) feel brighter and more energizing.
When choosing bulbs, opt for dimmable LEDs rated for your fixture type (not all LEDs dim smoothly). Dimmers let you adjust light intensity based on time of day and activity. In a finished basement that doubles as an entertainment space, the ability to lower lights is invaluable.
Consider smart bulbs if you want flexibility without adding wiring. They’re pricier upfront but allow app-controlled brightness and color temperature adjustments. Practical homeowner tips often highlight how proper lighting ties decor together, making investment in good fixtures worthwhile.
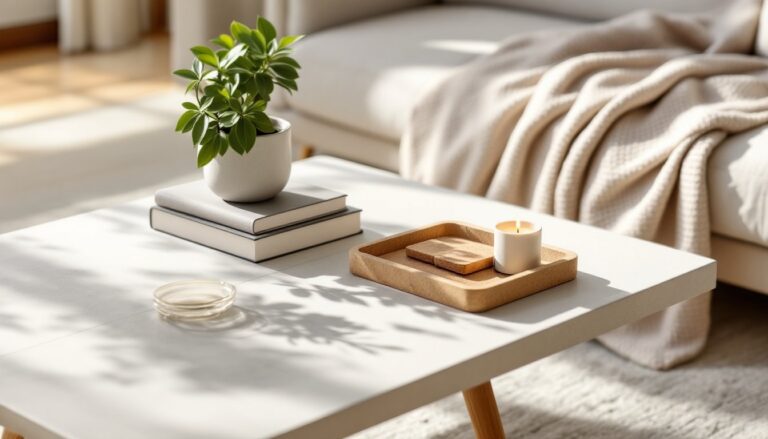
Textiles and Fabric Panels for Warmth
Hard surfaces, concrete, drywall, wood, reflect sound and feel cold. Textiles absorb both, making basements feel warmer and more livable. Rugs, curtains, and upholstered furniture are practical and aesthetic.
Area rugs define zones and add warmth underfoot. In a basement, choose rugs with a tight weave or low pile to resist moisture and mildew. Avoid delicate natural fibers (sisal, jute) directly on concrete: moisture wicks up from below. Instead, place a moisture-barrier rug pad underneath, then the rug. This also prevents slipping.
Curtains and drapes soften the space and can disguise narrow basement windows. Even in a basement without exterior windows, drapes over the wall where a window could be adds visual depth. Use moisture-resistant fabric or synthetic blends rather than delicate natural fibers. Install curtain rods on studs or with heavy-duty anchors.
Fabric panels (tapestries, wall hangings, or upholstered panels) absorb sound and add color. They’re especially useful in basements prone to echo. A large linen or canvas tapestry above a couch anchors the space and hides imperfect walls.
Throw pillows and blankets on seating areas add color and comfort without permanent commitment. Rotate them seasonally for a fresh feel. Choose performance fabrics (Sunbrella, outdoor-grade synthetics) if the basement gets humid: they resist moisture and mildew better than regular upholstery.
Upholstered furniture like ottomans, chairs, or a sectional adds seating and softness. But, avoid storing upholstered pieces directly on a damp concrete floor: moisture from below causes mildew. Use furniture risers or a platform to create a gap between furniture and floor. Budget home renovation stories demonstrate how mixing hard and soft materials creates balanced, livable spaces that feel both stylish and functional.
Conclusion
Basement wall decor doesn’t require expensive contractors or structural changes. Start with paint or paneling to establish a solid foundation, then layer in lighting, artwork, and textiles that reflect your style. Address moisture concerns upfront, they undermine even the best-designed spaces, and remember that basements reveal results of skipped prep work faster than any other room. Work methodically, measure twice, and your basement transforms from an afterthought into a space your household actually uses.