A long, blank wall can feel like wasted real estate, or an incredible opportunity. Whether you’re staring down a hallway, a living room expanse, or a bedroom stretch, that bare surface is begging for purpose and personality. The trick isn’t just filling the space: it’s creating visual interest that invites people to pause and look. In 2026, long wall decor goes beyond slapping up a single print or hoping shelves do the heavy lifting. Smart homeowners are mixing curated collections, bold colors, functional storage, and reflective elements to turn dull stretches into rooms’ best features. This guide walks you through ten proven strategies, from gallery walls to accent colors to mirrors, with the specific how-tos, material recommendations, and honest talk about what requires skill versus what’s a weekend project.
Table of Contents
ToggleKey Takeaways
- Long wall decor transforms bare spaces by combining gallery walls, bold accent colors, functional shelving, and mirrors to create rooms’ best features.
- Gallery walls require careful planning: lay frames on the floor first, maintain consistent frame finishes within a color family, and hang at eye level (57–60 inches from the floor) for balanced visual impact.
- Large-scale artwork and oversized canvases (4-by-6 feet or larger) make bolder statements than multiple small prints and can be created affordably using poster prints mounted on plywood.
- Shelving solutions work best with asymmetrical layouts, proper stud anchors, and the rule of thirds styling (one-third books, one-third plants or sculptures, one-third negative space).
- Mirrors and reflective surfaces expand perceived space and amplify natural light when positioned to reflect windows or light sources rather than blank walls.
- Wall decals and temporary murals offer quick, renter-friendly transformations without permanent commitment, and their removable nature makes seasonal décor updates easy.
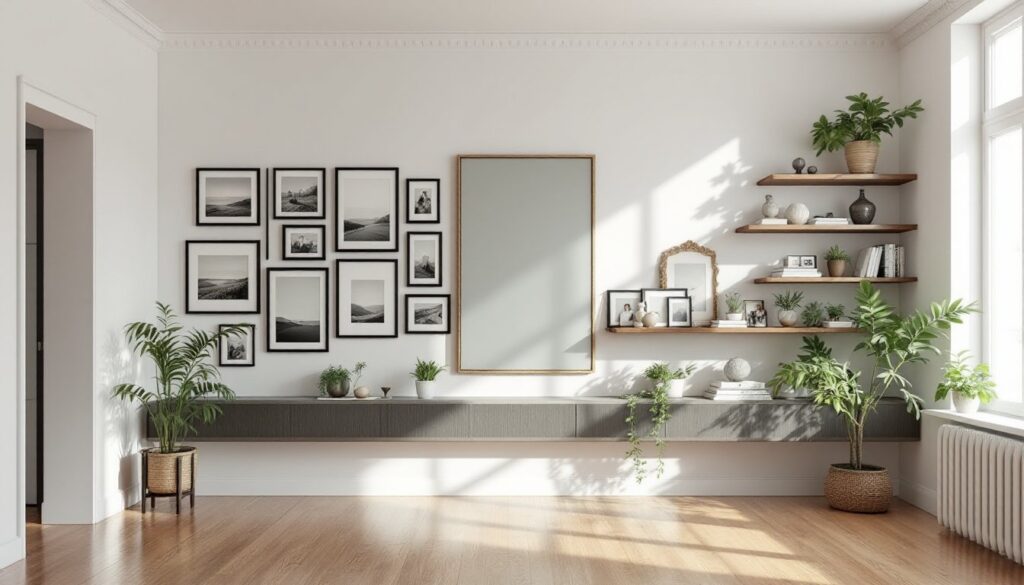
Gallery Walls: Creating Impact With Curated Collections
A gallery wall transforms a long stretch into a personal museum. The key isn’t random, it’s thoughtful curation and clean execution.
Start with a theme. Group by subject (family portraits, black-and-white landscapes, travel photography), by frame color (all black, all wood, all white), or by a mix of sizes that follow a loose pattern. Avoid the “everything and anything” trap: one unrelated poster throws off the whole wall.
Measure and sketch before drilling. Lay all frames on the floor in your desired arrangement. Take a phone photo. Measure the distance from each frame’s hanging point to its top corners, and note the dimensions from frame to frame. This prevents the common mistake of drilling crooked holes and creating gaps. Use painter’s tape and a level to mark exact spots on the wall.
Frame selection matters. A consistent finish, whether matte black metal, natural wood, or white lacquer, reads as intentional. Mix frame styles (slim, chunky, flat, shadowbox) within a color family for visual variety without chaos. On a long wall, spacing is critical: too tight and the collection feels cluttered: too loose and it fragments.
Hang frames at eye level. The center of the display should sit around 57 to 60 inches from the floor, standard eye height for standing viewers. For long walls in hallways or above sofas, this guideline keeps the arrangement feeling balanced and accessible.
Use quality wall anchors. Drywall alone won’t reliably hold heavy frames over time. Toggle bolts work well for heavier artwork (over 10 lbs per frame), while ribbed plastic anchors suit lighter pieces. If your wall is plaster, consider screw-in anchors designed for that material. Always use a stud finder if the wall permits: studs are the most secure anchor point.
Resources like Hunker offer step-by-step gallery wall design templates and layout guides if you want to visualize options before committing.
Large-Scale Artwork: Making Bold Statements
One oversized piece can anchor a long wall far more powerfully than a dozen small prints. A 4-by-6-foot canvas or larger immediately draws attention and creates a sense of sophistication, and yes, you can achieve this on a modest budget.
Canvas vs. framed prints. Canvas is lighter, takes less wall prep, and reads as modern and gallery-like. Framed prints (especially custom framing) feel more formal and suit traditional décor. For long walls, canvas typically makes more visual sense because it can be wider without requiring a frame footprint.
DIY oversize art. If gallery prices make you wince, commission affordable art through online platforms or create your own. One tried method: print a large image in sections (poster print at a local print shop), mount it on plywood with spray adhesive, and wrap the edges with painter’s tape or trim for a polished look. Budget under $100, depending on your source image and plywood grade, far less than a $500+ framed piece.
Placement on long walls. Position your artwork off-center rather than dead middle for visual interest. A wide 24-36 inches off the floor to the center of the piece works well if it’s above furniture: adjust if hanging in open space. For truly tall art (6+ feet), verify your wall height and stud locations before committing to holes.
Mounting hardware. Heavy canvas or framed art needs solid support. D-rings (attached to the back of framed pieces) and picture hanging wire distribute weight better than a single center hook. For large canvases, a pair of flush-mount brackets or French cleats will handle 50+ lbs reliably. Test your wall anchor’s weight rating, most drywall anchors fail in the 25-50 lb range.
Tutorials on creating affordable large-scale wall art show DIY methods that produce professional-looking results without breaking the budget.
Shelving Solutions: Functional Beauty for Long Spaces
Floating shelves turn a long wall into organized display space, books, plants, decor objects, and family photos all earn real estate.
Plan your shelf layout first. Asymmetrical arrangements (staggered heights and spacing) feel more dynamic than evenly spaced rows, especially on long walls. Sketch the wall to scale and play with 2, 3, or 4 shelves before drilling. Consider sight lines: if you’ll look at this shelf from a couch 8 feet away, your eye needs enough breathing room between shelves.
Shelf depth and weight capacity. Standard 10-to-12-inch-deep shelves work for most décor and light books. Heavier collections (coffee table books, decorative objects) demand 12-to-15-inch-deep shelves and robust wall anchors. Check the manufacturer’s rated capacity, a 100-lb rating should comfortably handle styled shelving with books and plants.
Finding studs is non-negotiable. A quality stud finder (under $20) locates wall framing. Attach shelf brackets to studs whenever possible: if that doesn’t align with your design, use heavy-duty toggle bolts or lag bolts into studs for maximum security. Drywall alone won’t reliably support shelves longer than 24 inches.
Styling shelves so they look intentional. Avoid the “museum of every object” look. Use the rule of thirds: one-third books (spines facing forward or stacked), one-third plants or sculptural items, one-third negative space. Vary heights and groupings, tall vase, short objects, trailing plant, so the eye moves naturally across the shelf. Consistent styling (matching book ends, cohesive plant pot colors) ties shelves together on a long wall.
Material choices. Wood shelves (walnut, oak, white-painted) suit most décor. Industrial metal or glass shelves work in modern spaces. Reclaimed wood adds character but requires testing for stability, old wood can warp or split over time.
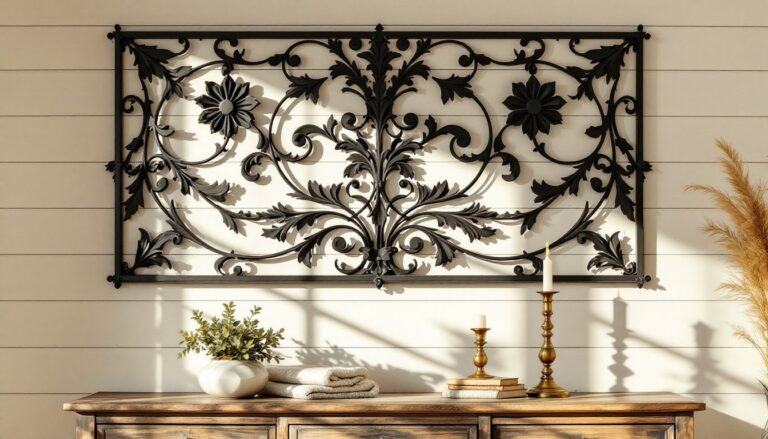
Accent Walls: Color and Texture Strategies
Painting a long wall a bold color is commitment, but it’s also the fastest way to redefine a room.
Prep is everything. Fill dents and holes with lightweight spackling compound, sand smooth with 120-grit sandpaper, and vacuum thoroughly. Wipe the wall with a damp cloth to remove dust, paint won’t adhere well to dust. If the wall has glossy paint or enamel, light sanding ensures the new paint grabs. This boring prep step prevents most DIY paint failures.
Primer before paint. One coat of quality primer (especially for dark, saturated colors) prevents patchy coverage and reduces the number of topcoats needed. Budget for this step, it’s not optional if you want a professional-looking result.
Color choices for long walls. Warm, saturated tones (deep greens, warm grays, terracotta) make long walls feel cozy. Cool colors (soft blue, pale gray) can feel expansive. Test large samples on your wall in natural and artificial light before committing. What looks great in a paint chip under fluorescent store lights can surprise you at home. Buy a small sample can and paint a 2-by-3-foot test section: live with it for 48 hours.
Texture adds dimension. Flat paint (matte) hides imperfections but shows handprints. Eggshell or satin finishes clean easily and have subtle sheen. For adventurous décor, textured finishes (popcorn, stucco-style products) add visual interest but become harder to repair or repaint later. Test texture on a scrap board first.
Painting long walls efficiently. Invest in a roller extension pole (extends 4 to 8 feet) so you’re not climbing a ladder constantly. A 9-inch roller covers faster than a 6-inch, reducing visible seams. Cut in edges (around trim, ceiling, floor) with a brush, then roll the field. Two coats of paint are standard for even coverage.
Budget-savvy renovators often find inspiration on Young House Love, which chronicles real room transformations and shares honest paint color decisions.
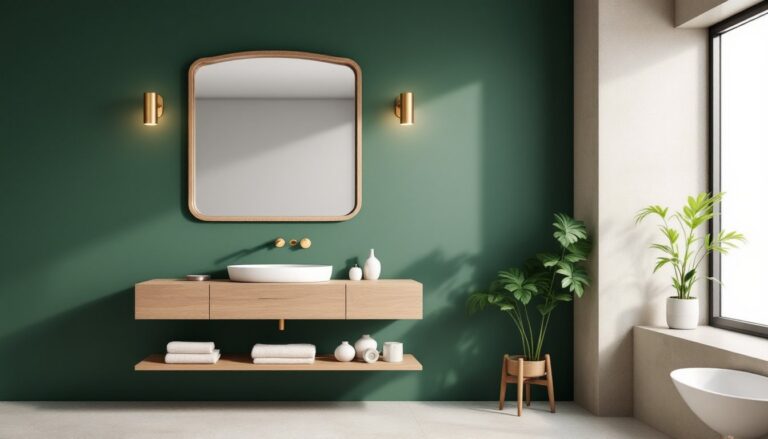
Mirrors and Reflective Surfaces: Expanding Your Space
Mirrors on a long wall do double duty: they visually expand the room and bounce light around, making spaces feel airier.
Mirror size and placement. A single large mirror (36 inches or wider) commands attention and bounces light effectively. Multiple smaller mirrors arranged in a grid or cluster also work, just maintain consistent spacing and framing. Position mirrors to reflect windows or light sources, not blank walls. This amplifies natural light and creates the illusion of more windows.
Frame or frameless. Frameless mirrors (beveled edges, clean lines) suit modern and minimalist décor. Framed mirrors in wood, metal, or ornamental finishes fit traditional, eclectic, or vintage styles. On a long wall, cohesive framing choices tie multiple mirrors together.
Weight and mounting. Large mirrors are heavy, a 36-by-48-inch mirror can weigh 80+ lbs. Always mount to studs using lag bolts or heavy-duty D-ring hardware. For mirror tiles or smaller mirrors (under 30 lbs), adhesive strips designed for mirrors work if the wall is clean and smooth, but mechanical fasteners are safer long-term.
Beyond traditional mirrors. Mirrored backsplash tiles, metallized wallpaper, or polished metal panels also reflect light and expand perceived space. These work especially well in hallways or powder rooms where a traditional mirror doesn’t fit the footprint. Adhesive-backed mirror tiles install quickly but require perfectly clean, flat walls.
Safety consideration. If children or pets inhabit the space, secure large mirrors firmly. A falling mirror is a serious hazard. Tempering (heat-treated safety glass) is optional but worthwhile in high-traffic areas.
Wall Decals and Murals: Quick Transformation Options
Wall decals and temporary murals offer big visual impact with zero permanent commitment, perfect for renters or indecisive decorators.
Decal types and application. Vinyl decals (trees, geometric patterns, inspirational quotes) stick directly to paint with no adhesive residue if removed carefully. Peel-and-stick murals (forest scenes, cityscapes, abstract patterns) cover large areas quickly. Both require clean, flat, dry walls. Any dust or moisture underneath reduces adhesion and causes peeling. Wipe the wall with a dry cloth before applying.
Removing decals safely. Peel slowly at a 45-degree angle: rushing causes paint damage. A heat gun on low setting softens adhesive and reduces damage risk. For stubborn residue, rubbing alcohol or adhesive remover works without harming paint, test in an inconspicuous spot first.
Mural scale on long walls. A single 8-to-10-foot wide mural transforms a hallway or bedroom wall dramatically. For variety, combine smaller decals (12 to 24 inches each) in clusters. Avoid cluttering: white space gives the wall room to breathe.
Installation tips. Use a level and measuring tape to mark the mural’s position before peeling backing. Most vinyl decals come with application fluid or transfer tape, follow the manufacturer’s directions precisely. Work from the center outward, smoothing bubbles as you go with a squeegee or credit card.
Lighting for murals. Backlit or textured murals (with dimensional elements) cast shadows that add depth. Standard flat decals work best with good natural light: shadowed corners can hide details. Position decals where they’ll be clearly visible during day and with artificial light.
Seasonal swap potential. Because decals remove cleanly, they’re ideal for seasonal décor changes, autumn foliage in fall, winter scenes in December, fresh florals in spring. This makes them particularly appealing for long walls in shared spaces like kitchens or hallways.
Conclusion
Long walls aren’t blank canvases, they’re opportunities to define your space’s character and function. Whether you’re layering a gallery wall, anchoring with oversized art, building shelves, painting bold color, reflecting light with mirrors, or experimenting with temporary decals, the goal remains the same: intentionality. Start with a plan, invest in proper hardware, and don’t skip prep work. Most long wall projects fall flat not from lack of ideas but from rushed execution or undersized anchors. Measure twice, use a level, and commit fully. Your hallway, bedroom, or living room will thank you.